Live VM pilot · 29–30 September 2026
Your first server, step by step.
Real screens from a live Nodara installation: one Linux VM running the panel, worker, agent and a Minecraft server together.
Choose the right installation path. New customers should start with the private repository access and Debian 13 installation guide. This case study used an existing Ubuntu VM with other applications already running. It was commissioned manually; the fresh installer was not forced past its safety checks.
What was installed
The VM runs Ubuntu 24.04, with four virtual CPUs and approximately 12 GiB RAM. Existing application and PostgreSQL containers, Docker, and a Tailscale HTTPS route were preserved. Nodara uses dedicated nodara-panel and nodara-agent accounts, three systemd services, a separate Nginx site and its own SQLite database.
- Root-owned application and virtual environment:
/opt/nodara. The agent uses this same checkout; the separate-node example path is adapted accordingly. - Python 3.13 was installed separately under
/opt/nodara-python, leaving Ubuntu’s system Python unchanged. Locked dependencies were installed into Nodara’s virtual environment. - Secrets: root-owned mode-0600 files under
/etc/nodara. Agent state:/var/lib/nodara-agent. Persistent game and backup data: Nodara-labelled Docker volumes. - Panel and agent HTTP listen only on
127.0.0.1:8000and127.0.0.1:8081. Only the agent account has Docker access. - The test game is limited to 2 GiB RAM and one CPU core. The node advertises 3 GiB and one core of usable allocation, leaving capacity for the existing applications.
Before installing on an occupied host, inventory listening ports, running units, containers, proxy routes and free resources. Use the manual guide and preserve the existing configuration. Do not replace Docker, its data, or another application’s proxy site.
cat /etc/os-release
python3 --version
free -h
df -h /
ss -lntup
systemctl list-units --type=service --state=running
docker ps
tailscale serve status
A separate, private HTTPS endpoint
The existing Tailscale application keeps port 443. Nodara’s Nginx site listens on the VM’s Tailscale IPv4 address at port 8443, with a trusted certificate issued through tailscale cert. Game port 25565 and SFTP port 2022 also bind only to the Tailscale interface. Pilot users must be connected to the permitted tailnet.
For your own host, substitute its Tailscale address and certificate hostname. Set the exact origin, including :8443, in both NODARA_PUBLIC_URL and NODARA_PANEL_URL; NODARA_ALLOWED_HOSTS contains the hostname without a port. Preserve the port when forwarding the Host header:
# Excerpt only: merge into the complete TLS site from the manual guide.
# Replace both placeholders with your own values.
listen YOUR_TAILSCALE_IPV4:8443 ssl;
server_name YOUR_TAILSCALE_HOSTNAME;
# Inside the existing location / block:
proxy_set_header Host $http_host;
proxy_set_header X-Forwarded-Proto https;
Use a dedicated certificate/key location with restricted permissions. In this pilot, a daily nodara-certificate.timer runs tailscale cert, validates Nginx and reloads it; the renewal command was tested. Nginx starts after Tailscale and retries failed startup. A full VM reboot was not performed because the host also runs other applications. See the Tailscale HTTPS documentation and separate Python installation guidance for their prerequisites.
Public access follow-up: this pilot later added a separate trusted public-IP HTTPS listener on port 8443 while retaining its private route and the existing Tailscale application on 443. This was a manual deployment change, not an installer IP-certificate option. For your own public endpoint, provision a certificate valid for the exact IP/hostname, maintain renewal, set the allowed host and origin, and validate from a separate device. Only panel HTTPS was shared publicly; private game/SFTP binds were retained.
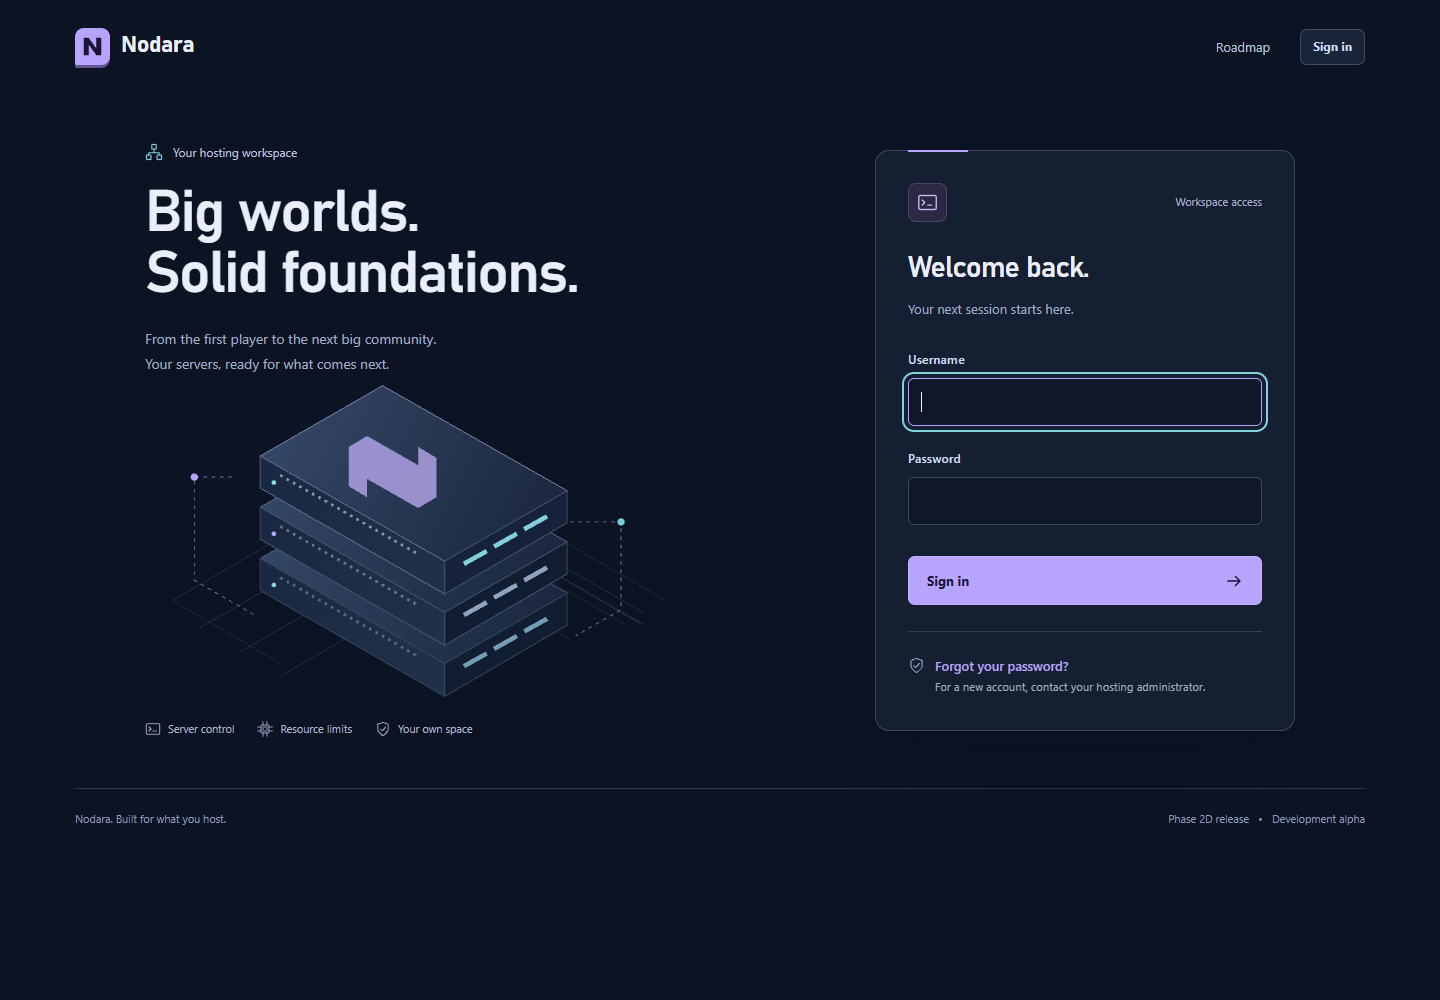
1. Sign in to your panel
Open your installation’s HTTPS URL and use the administrator credentials created during setup. There is no universal Nodara password. Keep your password out of screenshots and enable MFA from Account security, saving your recovery codes privately.
2. Check the local node
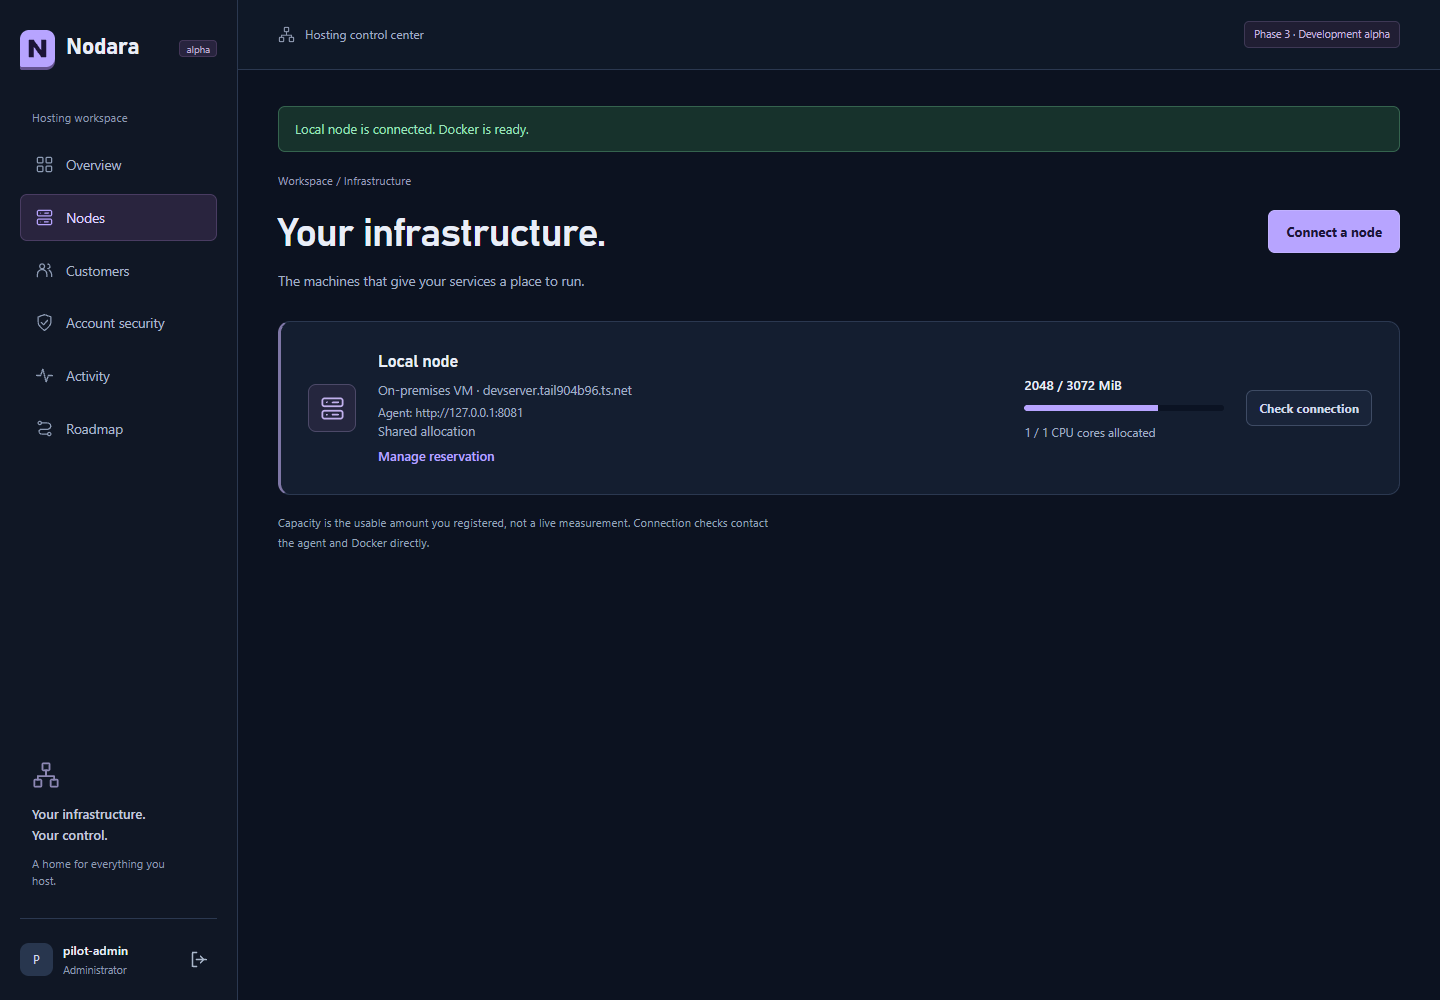
Open Nodes and select Check connection. The success message confirms that the panel can authenticate to the agent and that Docker is ready. The fresh installer registers this local node; a manual deployment must register it using the same protected agent token. Never paste that token into documentation or a screenshot.
Registered capacity is your allocation budget, not a measurement of free host resources. Leave headroom for Ubuntu, the panel and any other applications.
3. Create a small pilot server
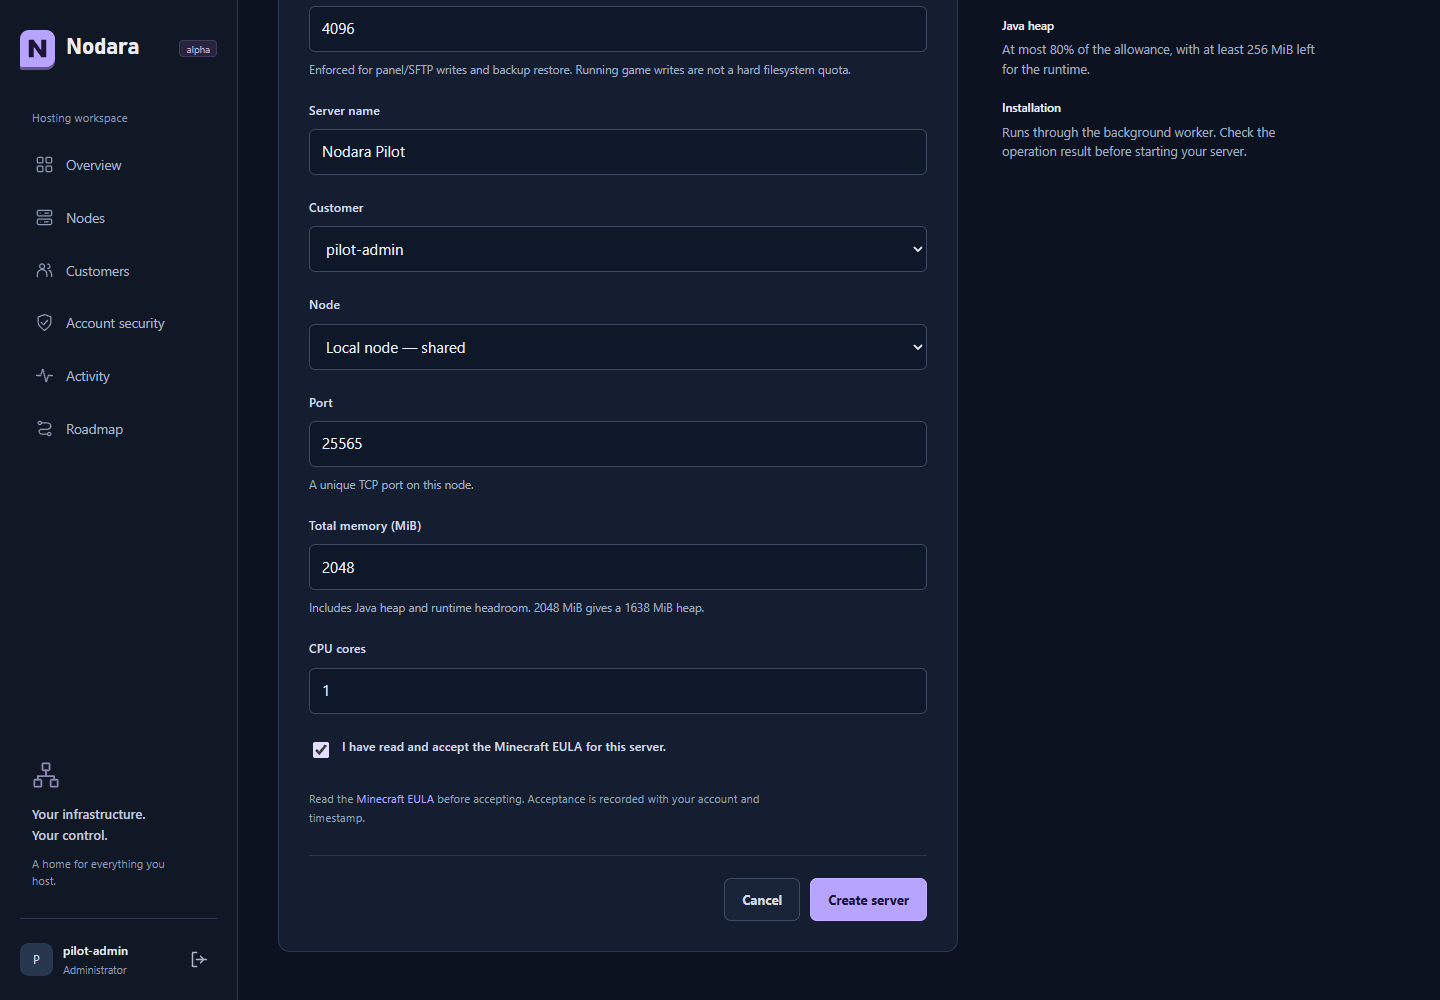
From Overview → Create server, choose a runtime profile, customer, node and unused game port. This pilot uses Vanilla 1.21.1 with Java 21, 2048 MiB total memory, one CPU core and a 4096 MiB managed storage allowance. The operator read and accepted the Minecraft EULA before submitting the form.
The storage allowance governs managed writes and restore operations; it is not a hard filesystem quota on running Minecraft. Start small and measure your actual workload.
4. Wait for provisioning, then start
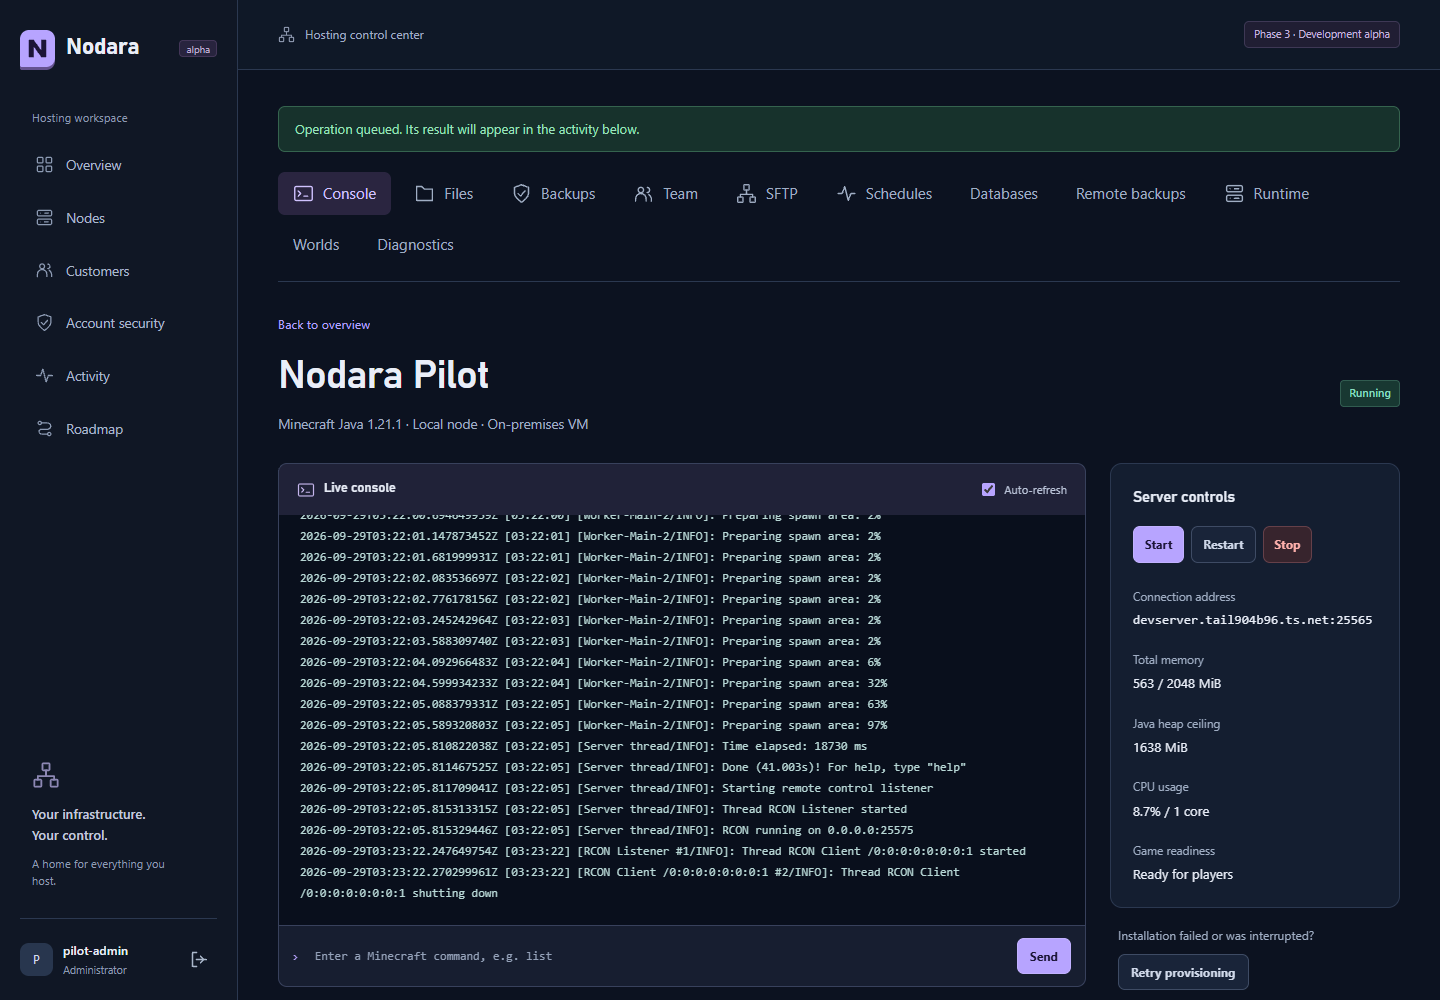
Wait for Provision → Succeeded in Operations, then select Start. The initial image download and world generation take time. A running container is not yet a ready game: wait for the console’s completion message and the panel’s Ready for players status.
Enter list in the console and confirm the queued command succeeds. In this pilot, a separate computer also contacted the private game port and received the Minecraft 1.21.1 server status. That proves network reachability and a responding game server; a signed-in player session is a separate acceptance check.
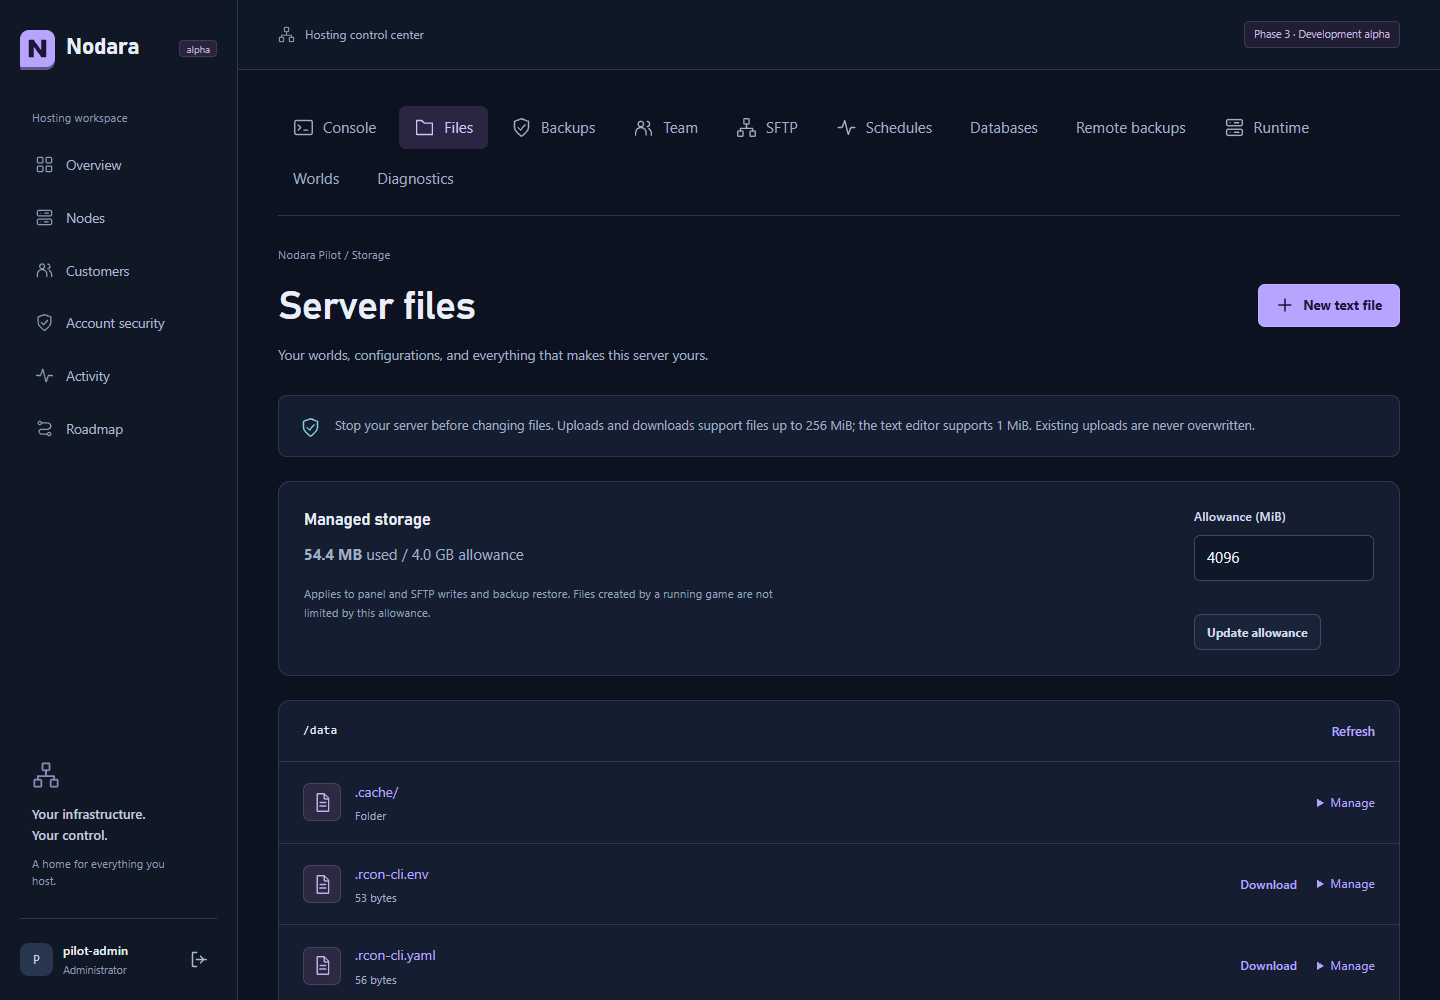
5. Inspect and edit server files
Open Files to see the server’s actual persistent data, including its generated world. Stop the game before editing or uploading files. The browser editor was used to change a disposable text file during the restore test.
Some runtime configuration files contain credentials. Do not open those files while recording a public demonstration.
6. Make a recovery point and verify it
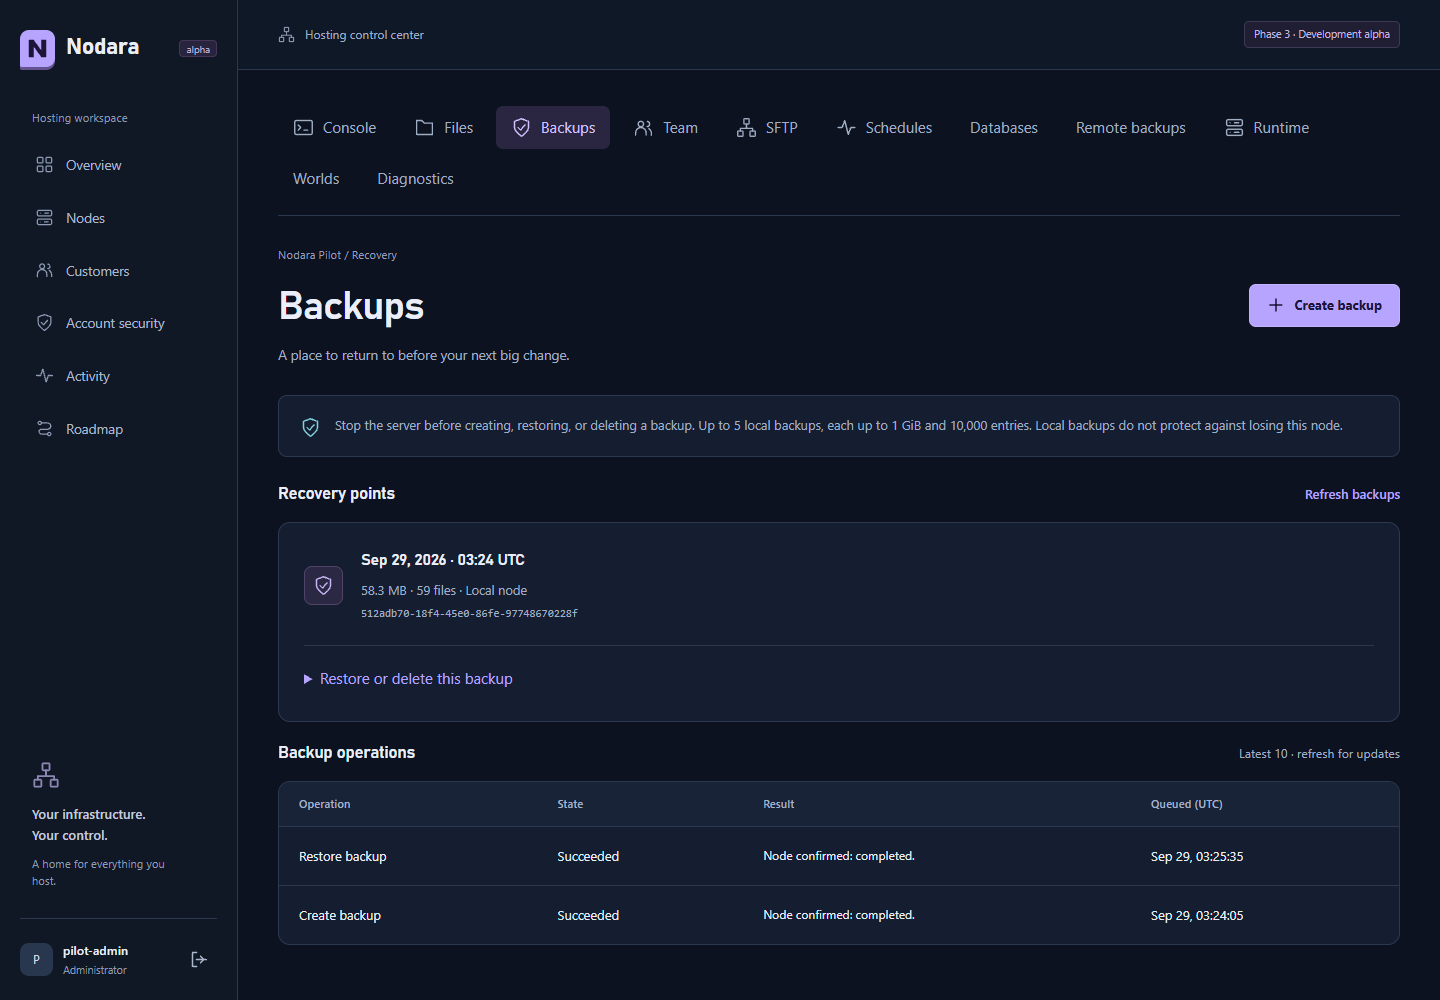
- Stop the game and wait for the stop operation to succeed.
- Open Backups, select Create backup, then refresh until it succeeds.
- On disposable test data, make a small change and select Restore or delete this backup.
- Read the replacement warning, enter the server name and confirm Restore backup.
- Verify the restored files before starting the game again.
The live test restored the exact original checksum of both a deliberately edited text file and world/level.dat. Local game backups do not protect against losing the VM and do not replace panel/database/configuration backups.
7. Connect an SFTP client
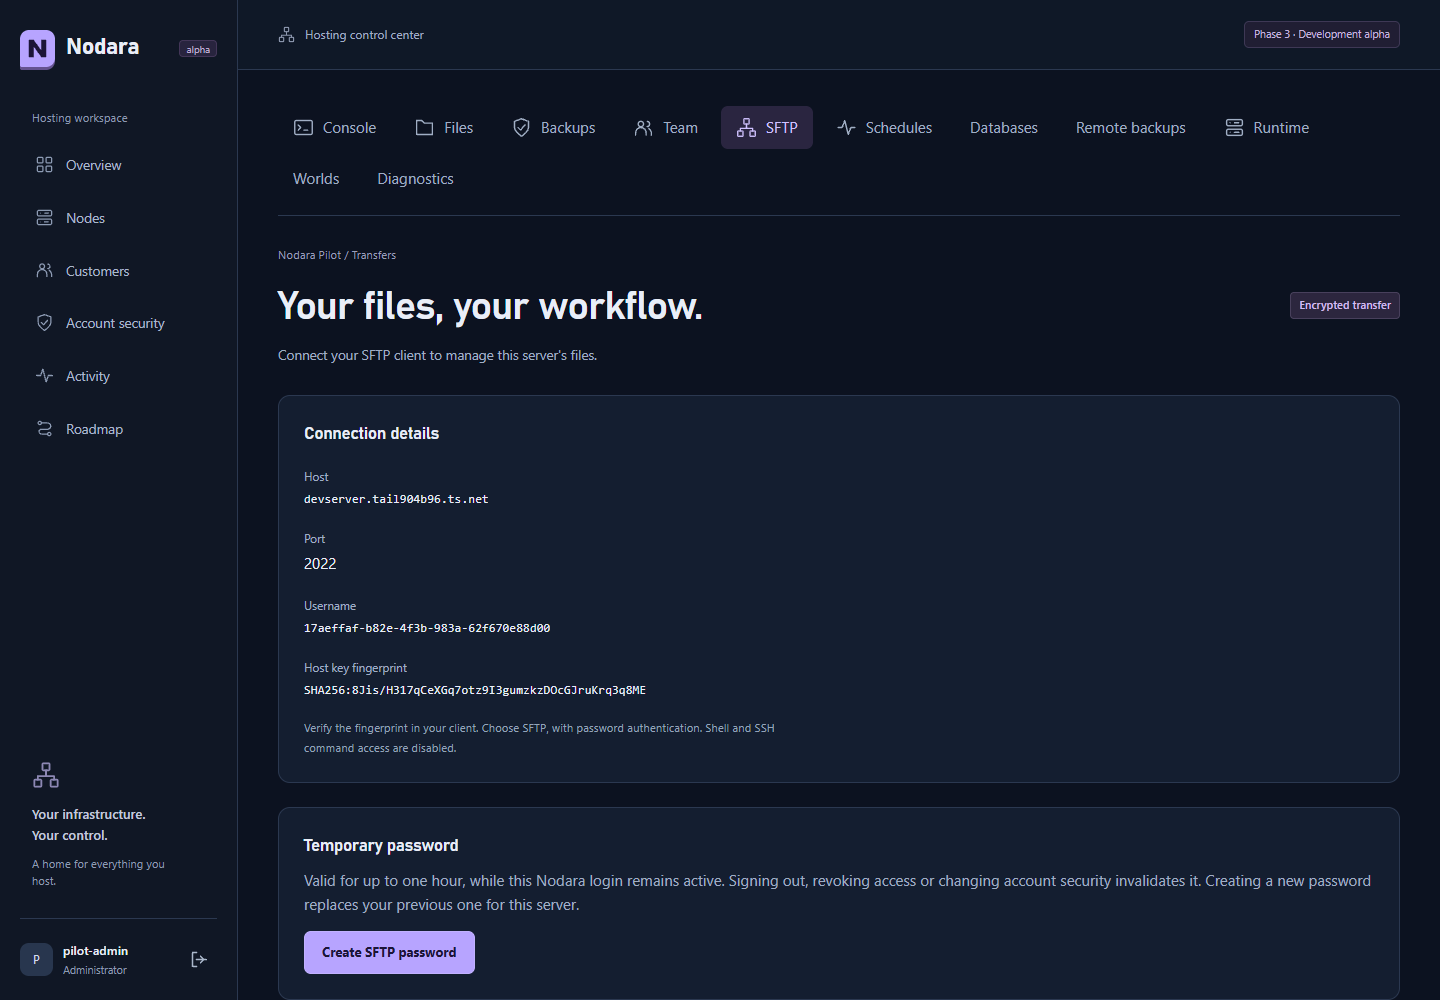
Open SFTP, use the displayed host, port and server UUID, and verify the host-key fingerprint in your client. Generate a temporary password privately. It is session-bound, expires within an hour, and can be revoked from the panel.
An SFTP client uploaded and downloaded a test file with host-key verification enabled. A second connection with the revoked credential was rejected. Keep the game stopped for writes, and never publish the temporary password.
Verify installation repair
This manually commissioned instance has a protected baseline created only after its source, permissions, dependencies, database, certificate and live endpoints passed checks. The pilot includes a small fix to record a private HTTPS port while retaining port 443 for existing baselines. It does not bypass certificate verification or restart Docker.
sudo nodara-repair check
sudo nodara-repair plan
# Review the plan; apply asks you to type REPAIR.
sudo nodara-repair apply
The live recovery test changed a Nodara template and stopped its worker. Repair restored the original file and service health, preserved the environment-file checksums, and left the existing applications and Tailscale route intact. The full repair reference explains its boundaries. Existing installations are not automatically adopted, and this pilot does not extend the fresh installer beyond Debian 13.
Keep your installation current
On 30 September the installation owner configured a dedicated read-only GitHub token and installed v0.4.0-alpha.1 from the panel. Public and private HTTPS, repair health and preservation of unrelated services passed afterward. Follow the upgrade guide with token-settings and completed-upgrade screenshots for the exact steps, backup scope and recovery commands.
What this pilot verifies
| Check | Result |
|---|---|
| Trusted private HTTPS, administrator login and static assets | Passed |
| Panel → worker → authenticated Docker agent | Passed with a real Minecraft workload |
| Remote Minecraft status and console command | Passed |
| Browser file edit, SFTP round trip and credential revocation | Passed |
| Local backup/restore and world metadata checksums | Passed |
| Installation repair after file drift and stopped worker | Passed on the commissioned baseline |
| Existing applications, Docker daemon and Tailscale route | Preserved; service identities and container health checked |
| Owner-approved private release upgrade and trusted public/private HTTPS afterward | Passed for v0.4.0-alpha.1 on 30 September |
| Signed-in player gameplay, load test, SMTP delivery and VM reboot | Not verified in this shared-host pilot |
SMTP is not configured here; pilot email is written to protected local files. The certificate renewal command passed, but renewal across an actual expiry cycle remains a future check. The administrator should enroll their own MFA authenticator. Remote storage and managed database integrations were not configured.
The private-port adjustment is tracked in application PR #2 (repository access required). The seven setup screenshots on this page were captured at pilot revision b63671c2f9a3967c7bef33c95b03132a33881559 on 29 September. The live installation now runs v0.4.0-alpha.1 at ea2d761db92ac76a98ff9062082ed6123bf3b74f; see its current screenshot. These screenshots show the installed alpha interface; the website tracks Phases 1–3 as complete and Phase 4 as in progress. This is a bounded pilot result, not a production certification.